Week 2: Substrate Prep, Intro to Spore Prints, Vacuum Forms
April 5, 2024
Welcome back to my post-Spring Break blog!
A lot of this week has largely been dedicated to preparing what will become my substrates. I’m going to start with a bale of all-natural, sun-cured wheat straw, which I made sure was ordered without any added preservatives. After visiting multiple pet supply, gardening, and hardware stores, I learned that there are some key differences between straw and hay, which employees offered me, but would not actually be well-suited for my project. Straw typically contains fewer nutrients compared to hay. This lower nutrient content can be beneficial for growing mycelium because it reduces the likelihood of competing organisms, such as bacteria or other fungi, from thriving in the substrate. It also has a more fibrous and porous structure which provides a suitable environment for mycelium to colonize and spread. The mycelium can also easily penetrate the gaps and spaces within the straw.
The bale of straw came especially choppy and coarse – which was something I didn’t like about the results of the practice-run with the kit (see last week’s blog post!). Because of this, I decided to chop up and blend the wheat straw for a much finer consistency – which proved to be a very time-consuming process. This finer consistency can potentially aid in mycelium growth for certain types of fungi, particularly those that prefer smaller substrate particle sizes.
Oyster mushrooms (pleurotus ostreatus) work particularly well with straw, which is what I’ll be using first. Before I can pasteurize or sterilize the newly-chopped straw, I’ll need to actually start my own mycelium culture from mushroom spores. I’ve learned that you can obtain spores from a mature mushroom by collecting them onto a sterile surface and creating a spore print. More on this next week.
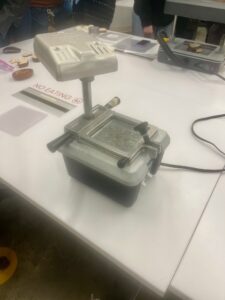
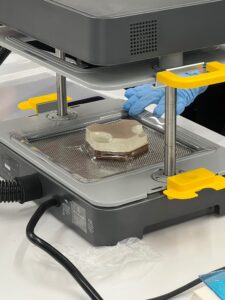
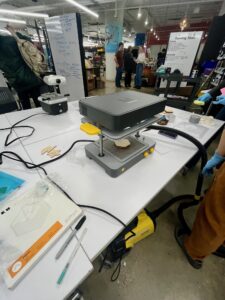
One anticipated challenge of this project was developing molds for the later stages of the project. At NYU’s MakerSpace design lab, in collaboration with Genspace, I learned about vacuum forms (see Figures 1, 2, & 3). Vacuum forming is a process where a thermoplastic sheet is heated until it becomes pliable, then stretched over a mold and formed into a specific shape using vacuum pressure. After forming, the plastic is allowed to cool and solidify while still in contact with the mold, then removed, and excess material is trimmed away to create the final product. This might be a viable way to make my palette molds closer to the end of the project.
Figure 1.

Figure 2. + Figure 3.


Reader Interactions
Comments
Leave a Reply
You must be logged in to post a comment.

Its really interesting watching your process unfold. I’m curious how much of an impact the substrate particle size has on the texture of your final product.
Yes! The size and texture of the substrate has a huge impact on the final product! This will be one of the biggest factors in determining which strain and substrate combination most closely compares to the plastic products, which are typically completely smooth.
This is so cool! These images really added to my understanding of your project! I wonder how accesible these materials would be for people to create the pallets on their own. Can’t wait to see your project go further into sustainable art, I beleive you mentioned making the paint aswell!
Yes, I’ll be trying to make the paints out of natural materials as well! Closer to the completion of the project, I will definitely have an overall reflection on how accessible I think making these are!