Week #2: Setup, Planning, and a Welcome Surprise
March 6, 2026
Intro:
Welcome to Week #2 of my blog! Last week, I spent a great deal of time planning for the remainder of the project and ordering parts online. Specifically, I ordered parts related to the detection and computing aspects of the project, as my drone frame wouldn’t arrive until late March. However, there’s been a surprising turn of events. By some form of magic, Amazon managed to deliver my drone frame on Wednesday, three weeks before it was expected to arrive. There are still some parts that need to be 3D printed, namely the forward camera tray, the downward camera tray, and upper deck shelf, but here’s what the rest looks like (along with the sudden change of delivery date):

Figure 1. Drone components for the Tarot 680 Pro build laid out before assembly. Photograph by author, 2026.
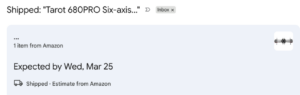
Figure 2. Screenshot of Amazon order confirmation email showing expected delivery date. Screenshot by author from Gmail, 2026.

Figure 3. Amazon shopping cart containing components for the Tarot 680 Pro hexacopter build. Screenshot by author from Amazon, 2026.
The Present:
I’m currently at a crossroads about how to proceed. I had originally planned on completing the drone first, and then moved onto the Raspberry Pi. But with the frame being delayed, I pivoted to completing the Raspberry Pi work first. Now, I have the freedom to basically do one or the other, depending on how I feel. I also have the freedom to complete both at the same time. I can take a break from building the drone whenever I need to step away from hardware, and vice versa with the detection work. I’m likely going to perform the initial setup of both for now, and take the most optimal route from there.
I’ve flashed the right OS (operating system) on the Raspberry Pi, and can begin setting up its connection to my Mac. I’ve also begun creating the basic project structure in VS Code, as well as plotting out the system architecture, pictured in this mermaid diagram:
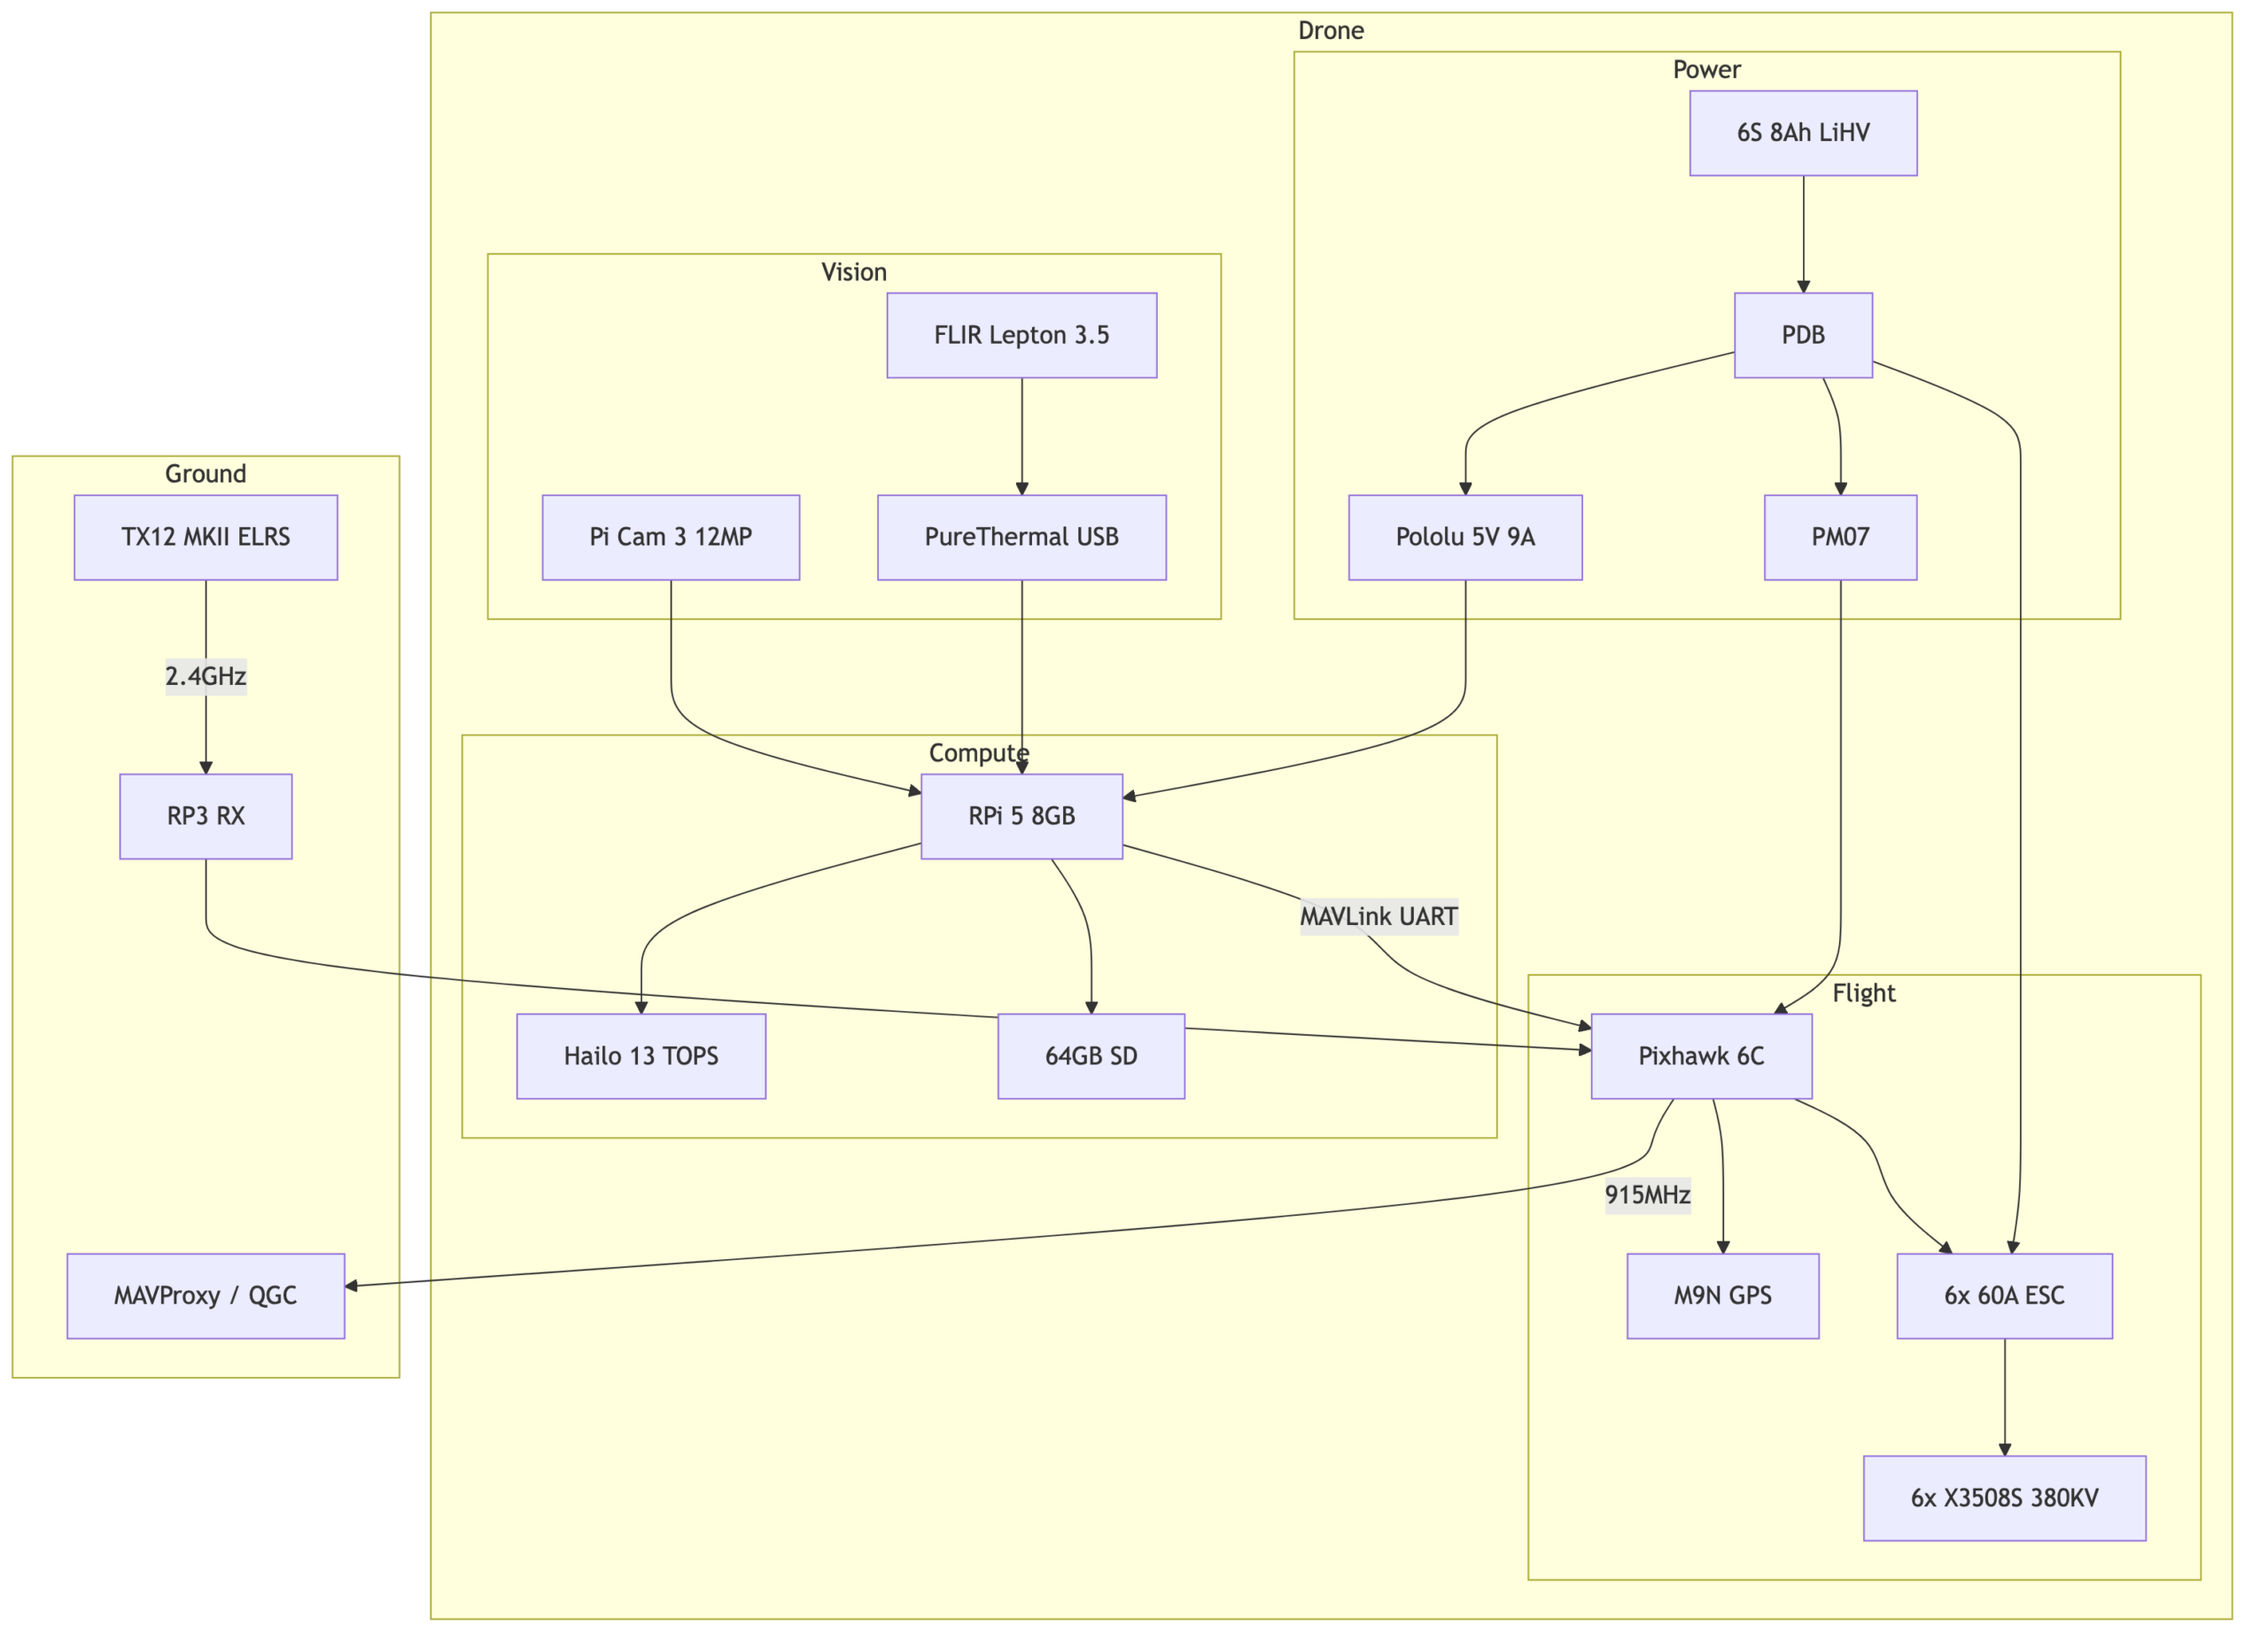
Figure 4. System architecture of the drone wildfire-detection pipeline generated from Mermaid code. Diagram by author, 2026.
Because the frame arrived, I had the chance to take some measurements and validate my initial drone design and components list before putting in any purchases. I found a critical issue: the of 15” propeller I wanted was actually too large for this frame. This meant that I could use a max of 13” props.
Next Steps:
Next week as the parts roll in, I plan to construct the initial frame with some basic wiring, as well as complete the initial smoke detection, which only uses the Raspberry Pi camera. The thermal detection with the FLIR Lepton 3.5 will be completed after that. I also plan to create data flow diagrams in Mermaid to represent both the Smoke Detection → Wind Estimation → Thermal Detection pipeline and the Autonomy Control Loop.
Questions:
Now for some questions for the readers. Do any of you know of anything similar or alternatives to Mermaid diagrams? I’ve found it to be incredibly helpful in putting my thoughts on (digital) paper and seeing how everything comes together. I’m wondering if there are any other tools like it that can provide a similar benefit to my workflow.
My other question would be: do you foresee any pitfalls in this project I haven’t covered? I think I’ve given a relatively comprehensive overview of this project and its goals via the project description and these past 2 weeks of blogs. I hope my readers are clear on these parts. However if there’s anything I need to clarify, please leave a comment and I’ll explain it all! Anyways, given your current understanding, are there any risky edge cases or unforeseen problems that my design doesn’t seem to cover, and I should factor in when purchasing parts for this build?
Final Treat:
And as a final treat, here’s an AI generated image that will provide a rough idea of what I’m going for by the final build:
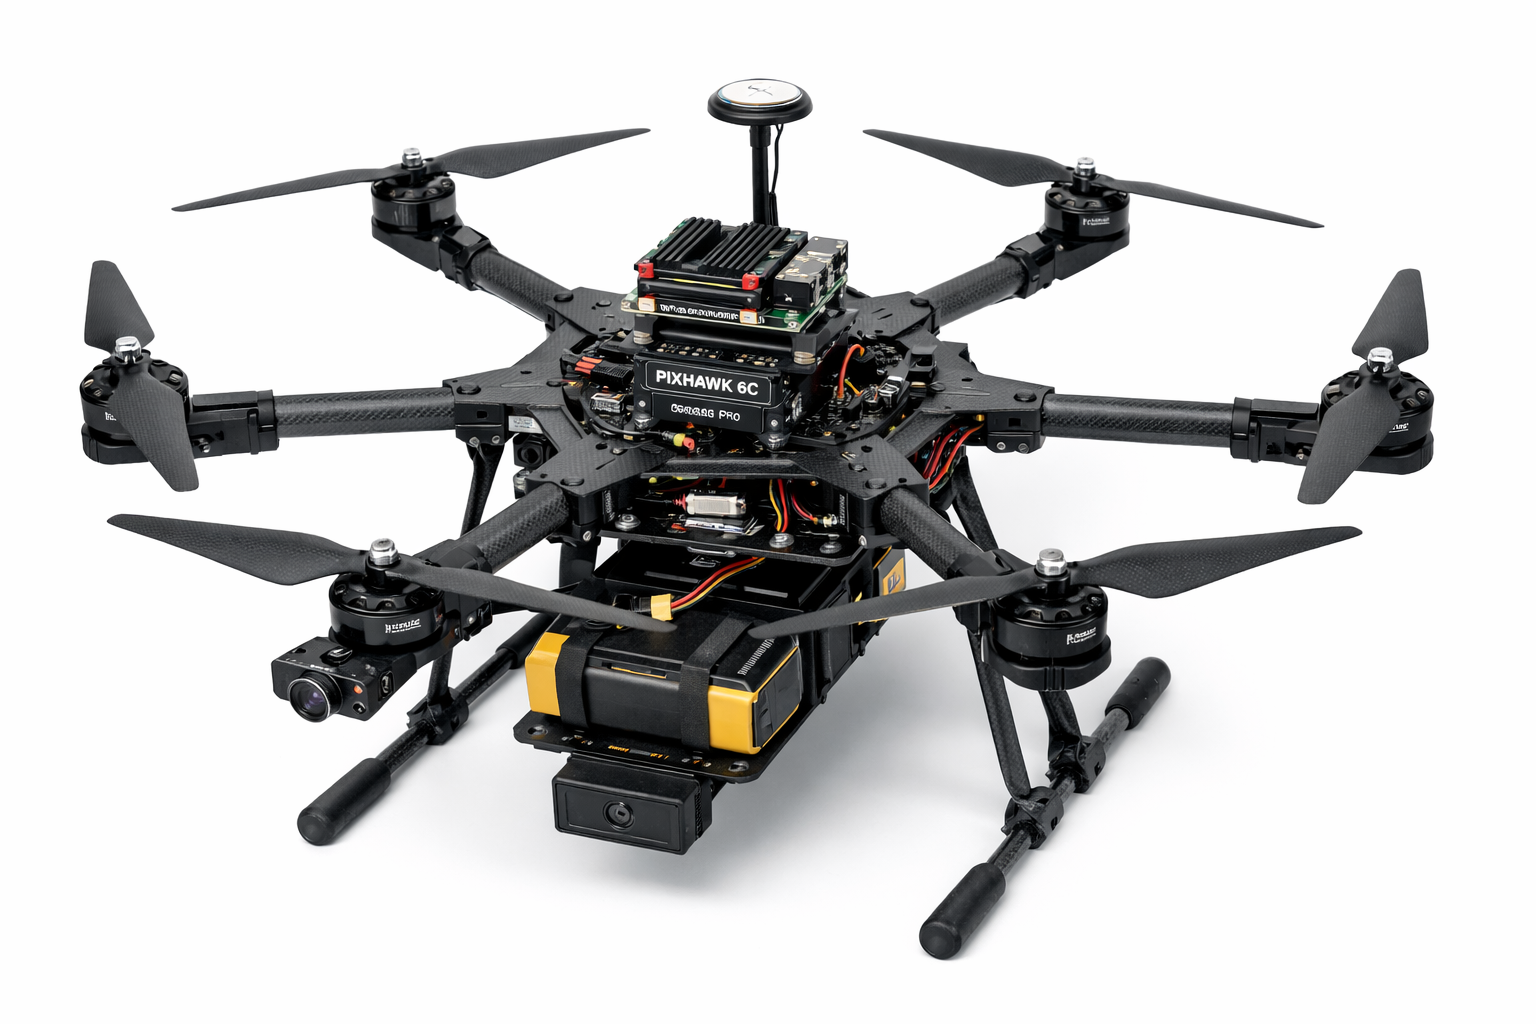
Figure 5. Concept render of the proposed drone system generated using AI (ChatGPT image generation), 2026.
Thanks for reading, and I hope to see you next week!
Key Terms:
- VS Code: text editor used for programming
- Autonomy Control Loop: Sense, decide, act cycle that continuously drives autonomous system behavior
Reader Interactions
Comments
Leave a Reply
You must be logged in to post a comment.
It was really interesting to read about how your plan changed once the drone frame arrived earlier than expected. I especially liked the way you’re using Mermaid diagrams to map out the system architecture before building everything. That seems like a really helpful way to organize how the sensing, processing, and control parts of the project will all work together, and it reminds me of pseudocode. One question I had is how the change in propeller size will affect your project? Is there any new problems that you need to consider?
Good question. The larger the propeller, the more I can mount onto the drone, as more thrust is generated. This is because the larger propeller can displace more air below the drone to move it or keep it loitering. So far, my design actually works for this new, smaller propeller size, and I’ve calculated that the new expected thrust is enough to carry what I want the drone to mount, for around 20 minutes.
For flowcharts and system architecture diagrams I like to use Google Drawings, which I used for the Build a CubeSat challenge presentation, and is more flexible with formating and being ~aesthetic~. I can’t think of major pitfalls off the top of my head, but how fast of a response speed are you aiming for (i.e. how much time between capturing a picture with a fire and reporting the fire to ground station), since you’re running the AI locally on the drone’s Raspberry Pi? And how far is the range for effective wireless communiction—will it be affected by fire or smoke? I’d like to know how that works in physical systems because the CubeSat I worked on was a verryyyyy not real-life-applicable model on a big table, haha.
Thank you for bringing that up! I actually haven’t finalized that part in my design. My external mentor and I discussed eventually interfacing with the onboard computer of something like a FYREBX vehicle, but nothing is concrete for now. I don’t think fire or smoke would effect and wireless communications, but I will consider it when designing that component.
I do have some questions about how the monitoring would work. Is it based on how dense the smoke is? If so, would the drone overestimate how large the fire has spread if the wind pushes smoke over unburnt areas and fail to evaluate where the actual fire is? I don’t quite understand how the wind estimation or thermal detection pipeline all fits together for your project. It would be really helpful if you could expand on this section maybe?
That’s a fair question. The prescribed burn is intentional so that fire is already expected. The real threat is embers being carried downwind and starting new spot fires. The drone will track the smoke plume to estimate wind direction, rotate to face downwind, and then watch that direction with the RGB camera for any new fire starting. If it sees something, the thermal camera will confirm with a heat signature.
I’m glad that your drone frames arrived early giving you more freedom to work on the parts of your project. I was wondering how the wind estimation element would play a part in your detection? Overall I think your current project progression is going well, and I don’t foresee any pitfalls.
Thanks your evaluation! I’m planning to use the wind estimation to position the drone in the direction of potential hotspots. During a prescribed fire, the wind may blow away embers or small lit patches, which can land elsewhere and start an unexpected fire. Looking in the same direction as the wind will allow me to easier detect them.
Congratulations on getting your parts in! While I’m not technical, working on both parts together seems like it could be beneficial, since you can ensure they work together and adapt hardware and software as needed. I also wonder if you could maybe map it out digitally to see if you need any parts adjusted so you don’t end up with the propeller issue again. Your project looks really great so far and I can’t wait to see where it goes next!
That’s a good idea! I currently have a CAD of the basic frame on my local computer, but I should also try to move electronics and other components onto it to see if all the different pieces can be fit into place. I’ll keep this updated.
This was really interesting, especially how you adapted your plan once the drone frame came early and caught the propeller size issue. Do you think working on both the hardware and detection system at the same time will help your progress, or make it harder to stay organized?
I should be able to manage both simultaneously. I’ll probably just swap what I’m working on whenever I get stuck for too long on something.